Select at least one measurement as template for the filter kernel. It is a good advise to use multiple measurements taken at different locations. You can select from all measurement files in the working directory.
If you want to optimize the result for a certain listening position in the room then select multiple measurements that are taken close to this position.
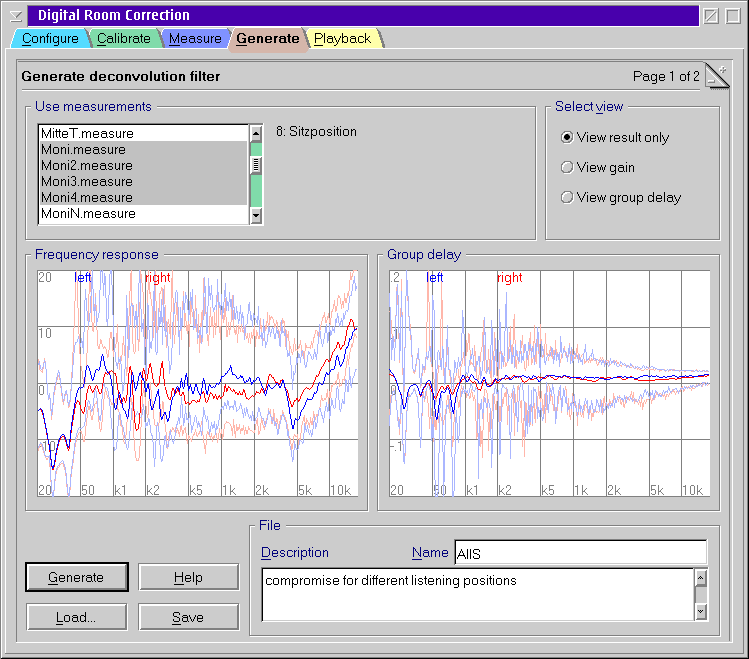
If you prefer to get a compromise that does not sound ugly when you move around in the room then take measurements from entirely different locations. DRC123 will take back the level at resonant frequencies in doubt to avoid resonances. If a certain region is your preferred listening place then select more measurements from this area.
If you are experienced or you just want to play around with the settings also have a look at the filter generation options.
There are three view modes. The default is to show only the result. The boundary bars show the minimum and the maximum of the contributing measurements.
The other two modes show either the gain response of the group delay of all contributing measurements (at most 11). This can be used to compare measurements. Note that you always need to generate the filter when you have selected other measurements.